


Before you begin:
Make sure your computer is running Windows 11 or Windows 10.
You'll need an 8GB or larger USB drive to create a bootable Ubuntu disk.
Backup any important data! This process will modify your disk partitions.
You'll need at least 50GB of free space on your hard drive for Ubuntu.
Software Downloads:
Download Ubuntu 22.04 LTS from the official website: https://ubuntu.com/
Download Rufus (or another tool like Balena Etcher) to create a bootable USB drive: https://rufus.ie/
Step 1: Download Ubuntu
Visit the official Ubuntu website and download the latest LTS version (currently Ubuntu 22.04 LTS).

Download Rufus from their website .

Step 2: Create Free Space
Open the search bar and type "disk management".
In the Disk Management window, identify the drive where Windows 11 is installed (usually Drive 0).
You'll see several partitions on this drive. Locate an existing partition where you can shrink the space to create free space for Ubuntu. Right-click on that partition and select "Shrink Volume".

Specify the amount of space (at least 50GB) you want to shrink and click "Shrink". This will create unallocated space on your drive.

Step 3: Create a Bootable USB Drive
Connect your USB drive to your computer.
Run Rufus as administrator.
In Rufus, select your USB drive from the "Device" dropdown menu.
Click "SELECT" to choose the downloaded Ubuntu ISO file.
Leave the "Partition scheme" as GPT and "Target system" as UEFI.
Click "START" to begin burning the ISO image to your USB drive. This process may take some time

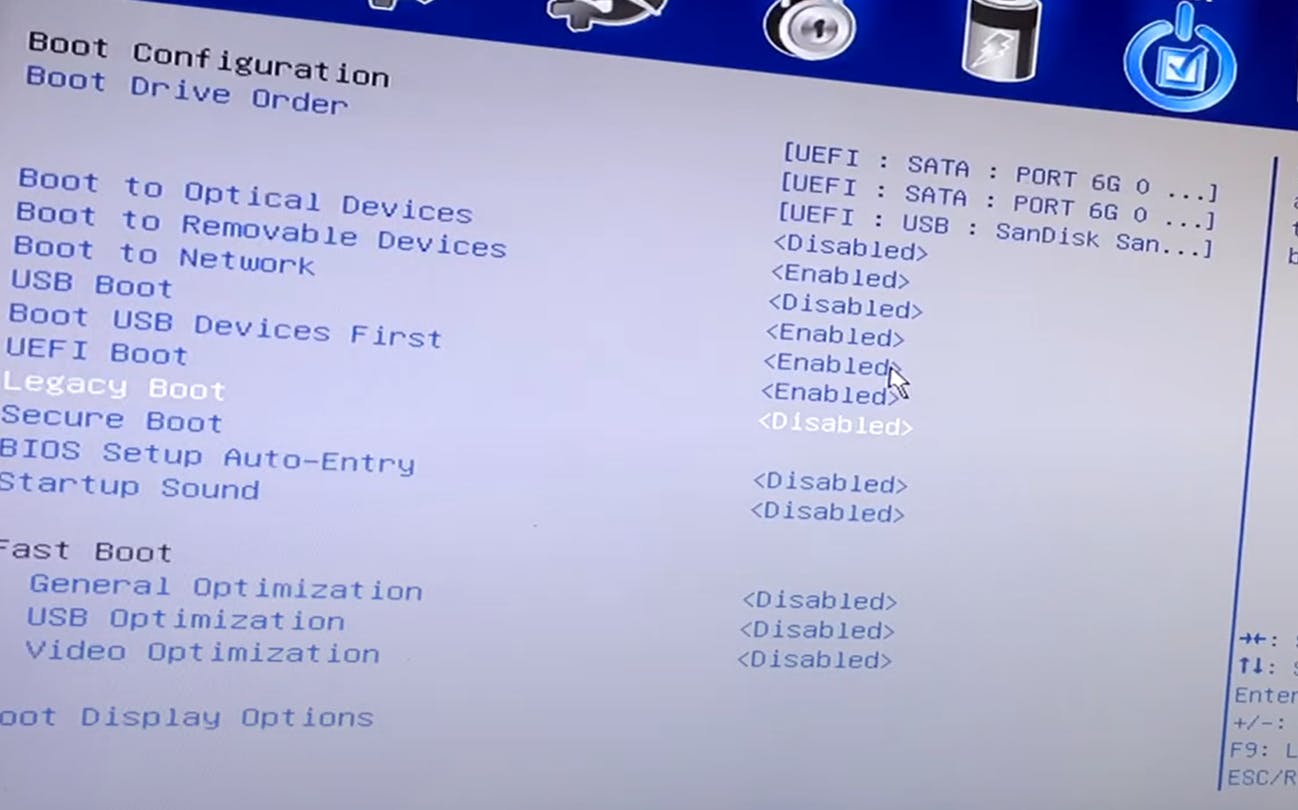
Step 4: Enable USB Boot
Restart your computer.
While your computer restarts, access the BIOS settings (usually by pressing a key like Escape, F2, F10, or F12 during startup). Consult your computer's manual for specific instructions.
In the BIOS settings, locate the option for USB Boot and ensure it's enabled. You may also need to disable features like Intel Rapid Storage Technology.
Save your changes and exit the BIOS settings
Step 5: Boot from the USB Drive
Restart your computer again.
Immediately after restarting, press the key you used to access the BIOS settings (Escape, F2, F10, or F12) to enter the boot menu.
In the boot menu, select your USB drive (it may be labeled by its brand name or size).
Your computer will now boot into the live Ubuntu environment.
Step 6: Install Ubuntu
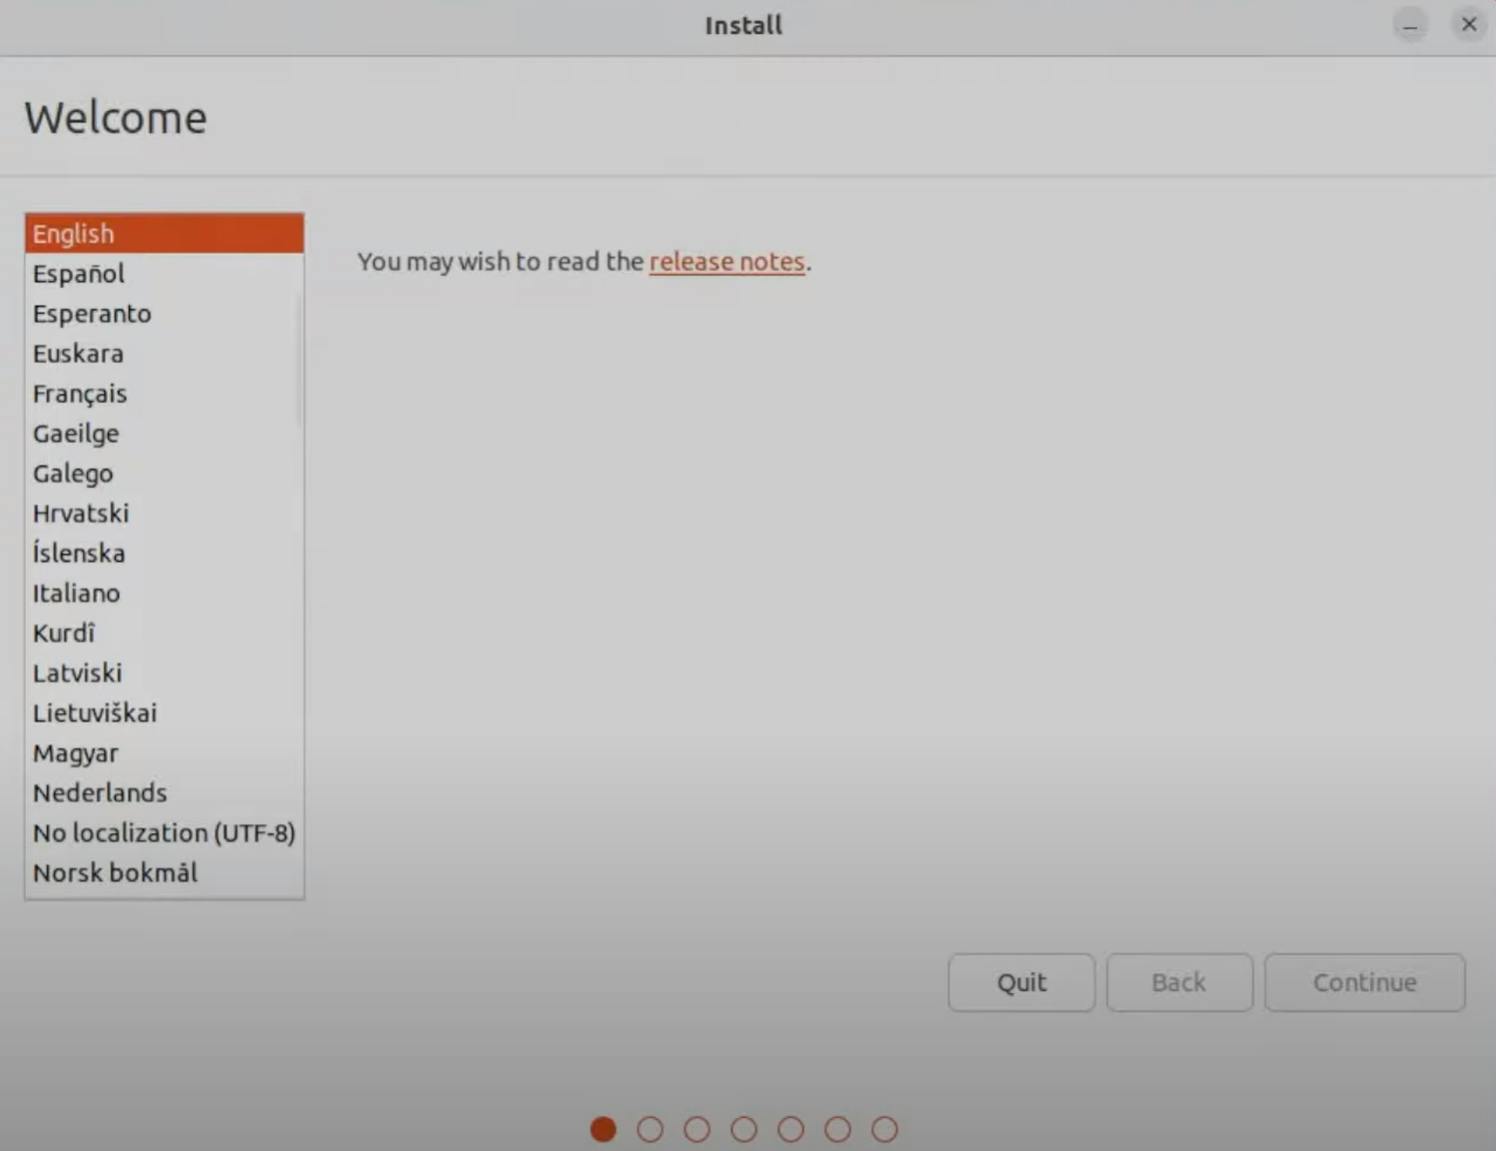
In the live Ubuntu environment, click on "Install Ubuntu".
Choose your preferred language and keyboard layout
Select the "Normal installation" option and choose to "Download updates while installing" and "Install third-party software for graphics and Wi-Fi hardware".
Click "Continue"

On the installation type screen, choose "Install Ubuntu alongside Windows 11 (shrink space)". This option will automatically create partitions for Ubuntu.
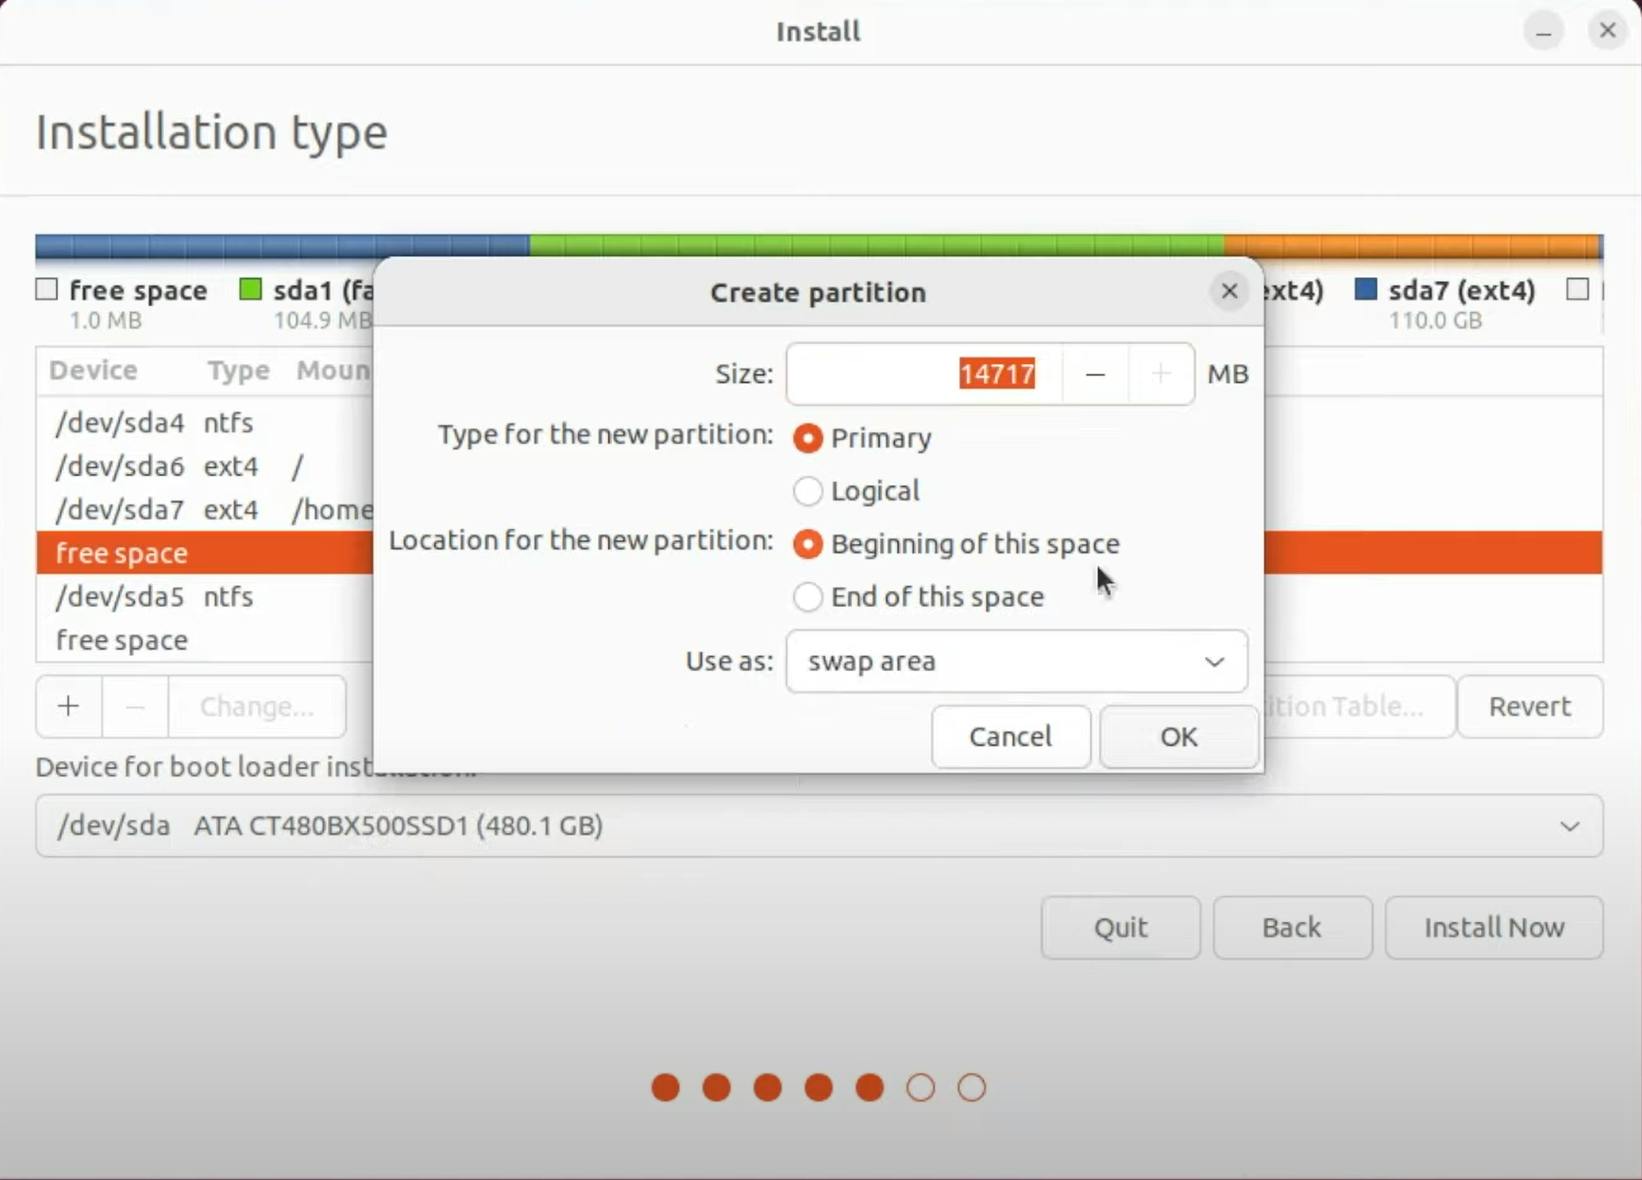
Alternatively, for a more advanced setup, you can choose "Something else" and manually create partitions for Ubuntu (root, home, and swap). Note: This option is for experienced users and can be risky if done incorrectly


If you're using the automatic partitioning option, select the free space you created earlier and click "Continue"
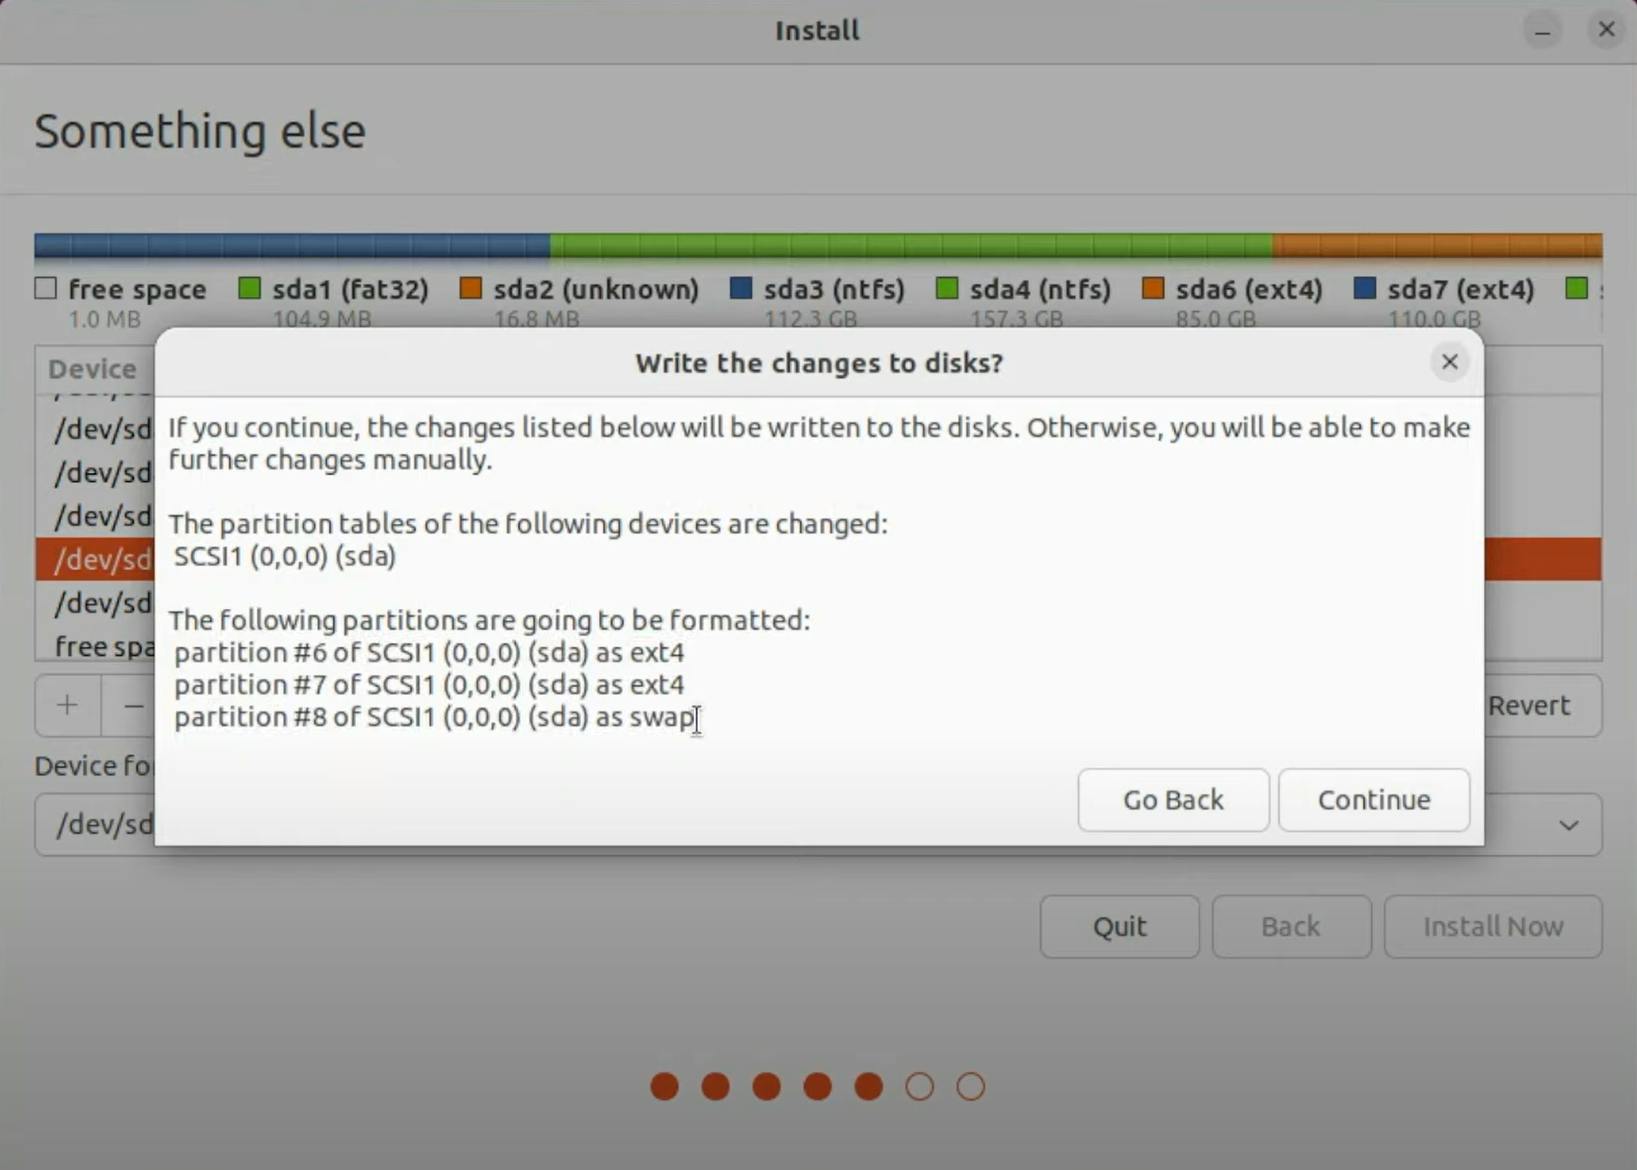
Review the installation details and click "Install Now" to begin the installation process.
Enter your desired username and password for your new Ubuntu installation.
Sit back and relax while Ubuntu installs. The installation process may take 5-20 minutes depending on your hardware.
Step 7: Removing Ubuntu (If error occurred during installation or compatibility issues )
Press
Windows + Xand select "Disk Management" from the menu.Right-click on the partitions allocated for Ubuntu and select "Delete Volume" for each partition.
Once all Ubuntu partitions are deleted, open Command Prompt as administrator.
Type
diskpartand pressEnterto open the DiskPart utility.Type
list diskto display all disks connected to the computer.Identify the disk containing the EFI partition (usually Disk 0).
Type
select disk X(replace X with the disk number) and pressEnter.Type
list partitionto display all partitions on the selected disk.Identify the EFI partition (usually the first partition).
Type
select partition Y(replace Y with the EFI partition number) and pressEnter.Type
assign letter=Z:(replace Z with an available drive letter) and pressEnter.Type
exitto exit DiskPart.Navigate to the EFI partition by typing
Z:and pressingEnter.Type
cd EFIand pressEnter.Type
dirand pressEnterto list the contents of the EFI partition.Identify and delete the Ubuntu folder by typing
rmdir /s ubuntuand pressingEnter.Restart your computer to ensure that Ubuntu has been removed from the dual-boot configuration.